前言
经历了宝塔和1panel的折磨,打使用docker来搭建网站环境。
安装docker和docker-compose
一键脚本
bash <(curl -sSL https://ghproxy.com/https://github.com/SuperManito/LinuxMirrors/raw/main/DockerInstallation.sh)此脚本可以更换国内源
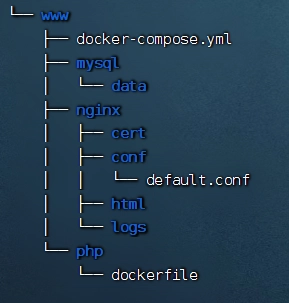
新建目录和文件
mkdir -p www/nginx/html www/mysql/data www/nginx/conf www/nginx/cert www/nginx/logs www/php && touch www/docker-compose.yml www/nginx/conf/default.conf www/php/dockerfile完成后目录结构如图
编辑docker-compose.yml文件
docker-compose.yml
version: '3'
services:
  nginx:
    image: nginx:1.21
    restart: always
    ports:
      - "80:80"
    links:
      - "php"
    volumes:
      - ./nginx/conf/default.conf:/etc/nginx/conf.d/default.conf
      - ./nginx/html/:/usr/share/nginx/html/
      - ./nginx/cert:/etc/nginx/cert
      - ./nginx/logs:/etc/nginx/logs
    container_name: "nginx"

  php:
    build: ./php
    restart: always
    expose:
      - "9000"
    links:
      - "mysql"
    volumes:
      - ./html/:/var/www/html/
    container_name: "php"
  mysql:
    image: mysql:8.0.33
    restart: always
    command: --default-authentication-plugin=mysql_native_password
    expose:
      - "3306"
    volumes:
      - ./mysql/data/:/var/lib/mysql/
    environment:
      MYSQL_ROOT_PASSWORD: admin123123
    container_name: "mysql"
注意,如果机器为arm64架构机器,请修改
  mysql:
    image: mysql:8.0.33
为
  mysql:
    image: arm64v8/mysql:8.0.33-oracle
编辑nginx默认配置文件
default.conf
server {
    listen 80;
    server_name localhost;
    location / {
        root /usr/share/nginx/html; # 代码目录
        index index.html index.htm index.php;
    }

    error_page 404 /404.html;
    location = /40x.html {
        root    /usr/share/nginx/html;
    }

    # redirect server error pages to the static page /50x.html
    error_page 500 502 503 504 /50x.html;
    location = /50x.html {
        root /usr/share/nginx/html;
    }

    location ~ \.php$ {
        root /var/www/html; # 代码目录
        fastcgi_pass php:9000; # compose文件中nginx段设置的links的php名称
        fastcgi_index index.php;
        fastcgi_param SCRIPT_FILENAME $document_root$fastcgi_script_name; # 修改为$document_root
        include fastcgi_params;

    }
}
编辑dockerfile文件
官方php有些拓展确实,所以需要自己构建dockerfile文件
FROM php:7.4-fpm
RUN mv /etc/apt/sources.list /etc/apt/sources.list.bak \
&& echo "deb http://mirrors.aliyun.com/debian/ bullseye main non-free contrib" >/etc/apt/sources.list \
&& echo "deb-src http://mirrors.aliyun.com/debian/ bullseye main non-free contrib" >>/etc/apt/sources.list \
&& echo "deb http://mirrors.aliyun.com/debian-security/ bullseye-security main" >>/etc/apt/sources.list \
&& echo "deb-src http://mirrors.aliyun.com/debian-security/ bullseye-security main" >>/etc/apt/sources.list \
&& echo "deb http://mirrors.aliyun.com/debian/ bullseye-updates main non-free contrib" >>/etc/apt/sources.list \
&& echo "deb-src http://mirrors.aliyun.com/debian/ bullseye-updates main non-free contrib" >>/etc/apt/sources.list \
&& echo "deb http://mirrors.aliyun.com/debian/ bullseye-backports main non-free contrib" >>/etc/apt/sources.list \
&& echo "deb-src http://mirrors.aliyun.com/debian/ bullseye-backports main non-free contrib" >>/etc/apt/sources.list
RUN apt-get update && apt-get install -y libwebp-dev libjpeg-dev libpng-dev libfreetype6-dev libzip-dev
RUN docker-php-ext-install pdo pdo_mysql mysqli bcmath exif zip开始构建
现在回到www目录
docker-compose up -d如果一切顺利,你将得到一个docker版的lnmp平台
将网站源码放入www/nginx/html目录中即可
补充
!!!注意,php连接数据库时,数据库地址请填写mysql的容器名称
查看docker容器名称
docker ps -a 
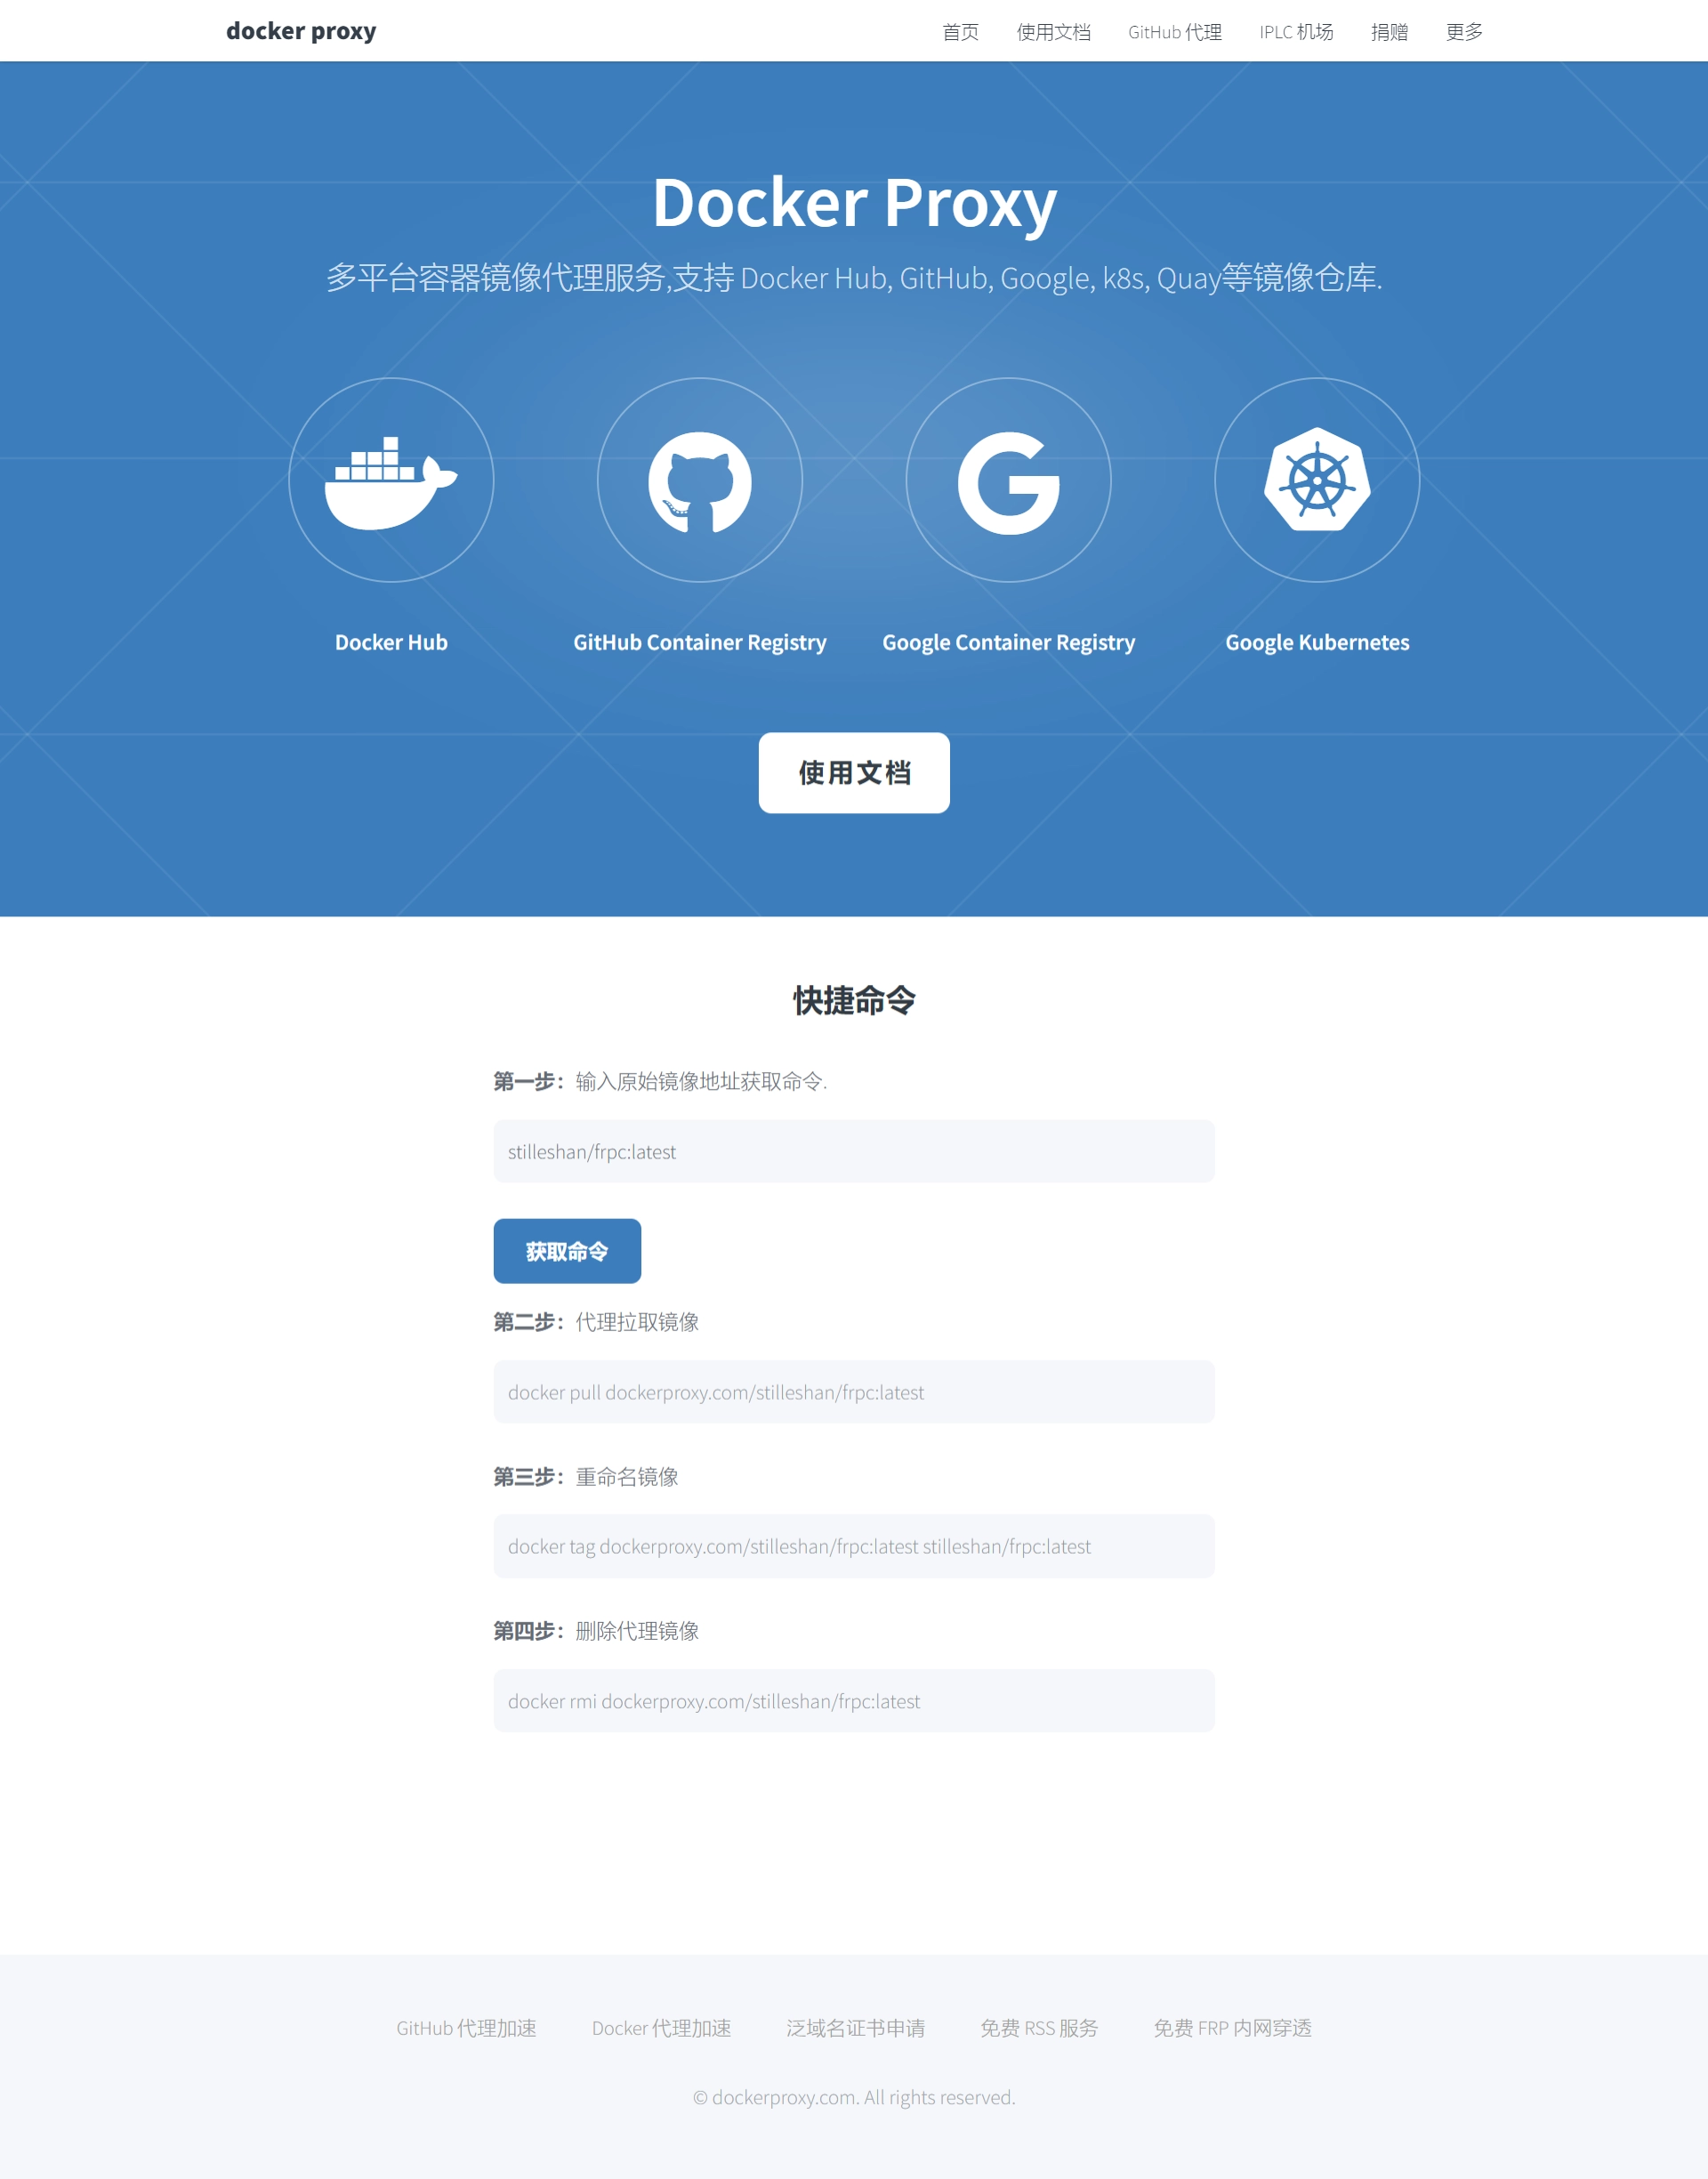
国内网络环境无法拉取镜像解决方法
Docker Proxy 镜像加速,自动生成pull命令,下载速度飞快!
如果需要使用反代地址拉取镜像,请提前使用docker pull命令拉取镜像再运行docker-compose.yml


你好,看完你的博客文章,感觉很不错!希望与你网站首页友情链接
流量卡知识网
http://53go.cn/
专注于移动/联通/电信推出的大流量多语音活动长短期套餐手机卡的相关知识的介绍普及
听说互换友情链接可以增加网站的收录量,特此来换,如果同意的话就给internetyewu@163.com[微信ganenboy]发信息或者就在此回复下吧!【建站问题也可以一起讨论!】